Introduction
In this post, I will explain about wordpress settings. After reading this post you will able to know How to Configure WordPress Dashboard Settings. When you first start working on WordPress, you’ll typically require to jump directly into creating content. However, before you get too far along, you’ll need to configure the basic WordPress settings because they create the groundwork for how your site works.
WordPress Dashboard Settings
Becoming close with these possibilities guarantees that you’re learning the most out of the policies. Plus, you’ll be ready to configure your website to work specifically the way you want.
In this post, I am going to examine the settings section of your WordPress dashboard, screen by screen. so that you will get clarity on this and it will be easy to use your WordPress website and you will know how to Configure WordPress Dashboard Settings.
1)WordPress General Screen
This first part of the WordPress settings is also the most outspoken. Here you can view and update the basic information about your website. The first two fields let you set a title and tagline for your website.

It’s essential to identify to customize your site’s tagline a quick way is to include a primary keyboard.
After this, you’ll see two URLs as follows

The first, your WordPress Address, is where your site is really located, while the Site Address is the URL people can use to visit your website. In nearly all cases, these will be the same. However, in some limited situations, you may need to change one or both URLs.
After this setting, you need to give your admin email address. It’s important that this address is correct since It’s where important information about your website is sent to given mail here. After this, you’ll see an option named Membership.

Allowing this will let anyone who visits your site create an account. This supports you easily set up your own membership website. If you tick this box, you’ll also want to make assured that the New User Default Role is set to Subscriber. This will guarantee that new members are given only the most basic permissions. The rest of the settings under General are pretty individual information.
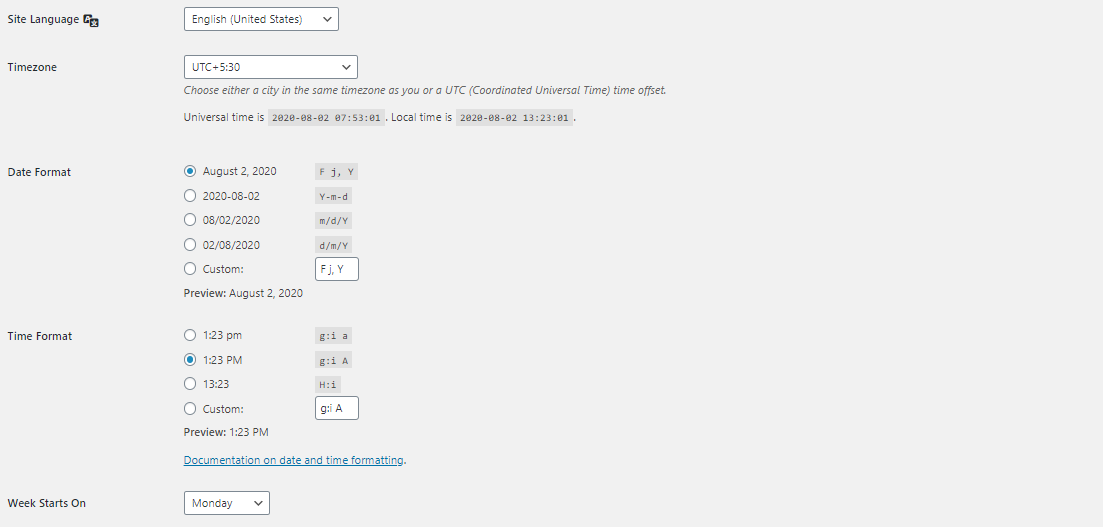
You can choose a default language and time zone for your website, and determine what format dates and times will appear in. Finally, you can choose what day you want your site’s week to start on, which will change any calendar-related features on your website.
2)WordPress Writing Screen
As the name hints, the following set of WordPress settings is all about writing blog posts. There are only a few options here.
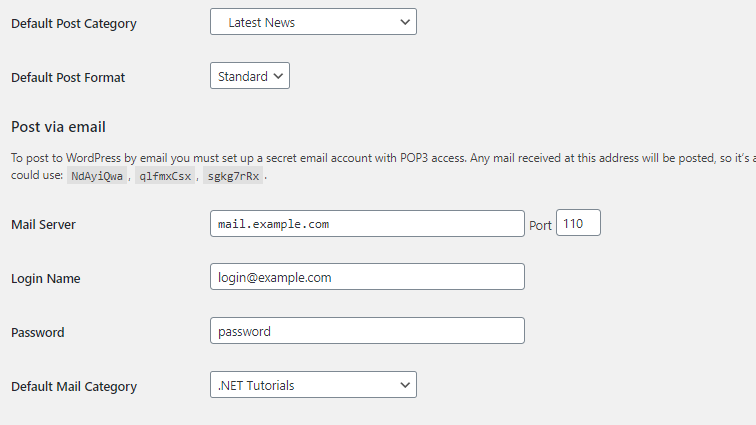
You can select a default category for your posts, which is useful if most of your content is on a simple topic. Most users will want to leave Default Post Setup set to Standard, but you force want to change this if a lot of your content is media-based rather than text-based.
Here, You can list services that will be mentioned whenever you publish a new post. We suggest leaving this as the default functionality.
3)WordPress Reading Screen
This section includes settings that determine how your posts look to readers. First of all, you can set your homepage. By default, your homepage is a list of your most new blog posts, which is helpful for blogs or news websites. However, it’s less typical for businesses, online stores, and so on. For these varieties of sites, you’ll commonly want to choose A static page as the homepage.
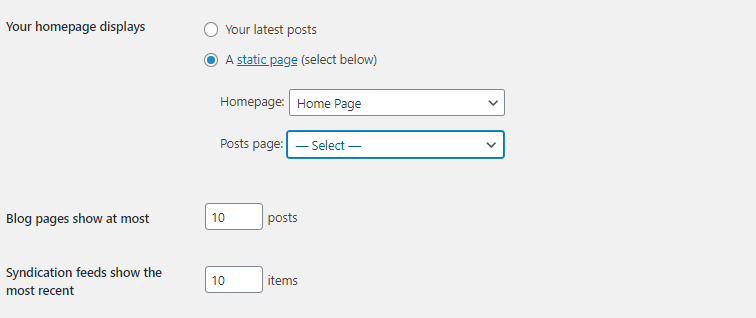
This will let you choose any page on your website to be the new home page (if you don’t have any pages yet, you’ll require to create one first). You’ll also require to select a new page to be the Home for your blog posts because they’ll still demand to be displayed somewhere.
After that, you can customize how many posts display up on your blog page, as well as in several feeds you have set up. You can set those as low or as high as you like. You can also determine whether you want feeds to display the full text of each post or just a review. This will decide how people who subscribe to your RSS feed will see the content that you have posted.
Last but not smallest, the Search Engine Visibility right is the most important setting on this page. Comparing it tells search engines like Google to neglect your site while leaving it unchecked means they will index it as simple.
In 99% of cases, this should be left unchecked. After all, search engines can be a significant source of the traffic to your website. However, you may require to select this choice if your site is expected to be private. In addition, it can be smart to leave this temporarily checked while you’re developing your site, so search engines don’t list it when It’s unfinished.
4)Wordpress Discussion Screen
This settings of WordPress is all about comments on your website
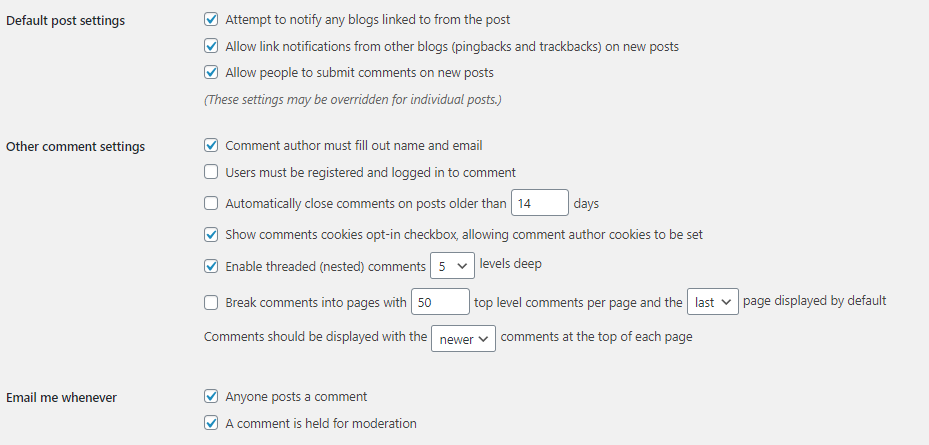
We’ll skip over most of the fundamental options since they’re relatively self – explanatory. One exception is to Support link notifications from different blogs on new articles, which can be complicated if you’re different from those terms.
There are additionally a lot of options here that can be valuable for controlling spam in your comments section. For example, you can use the Comment Moderation field to enter a list of words and URLs that can be used to automatically decrease spam comments.
Messages including any of the specified text will be checked for approval, rather than posting directly to your website. Alternatively, you can prevent particular terms altogether in the Comment Blacklist field. For help determining what those terms should be, you can check out this helpful blacklist on GitHub.
To wrap up, you can choose whether commenters will be allowed to use avatars, and tweak a few similar options
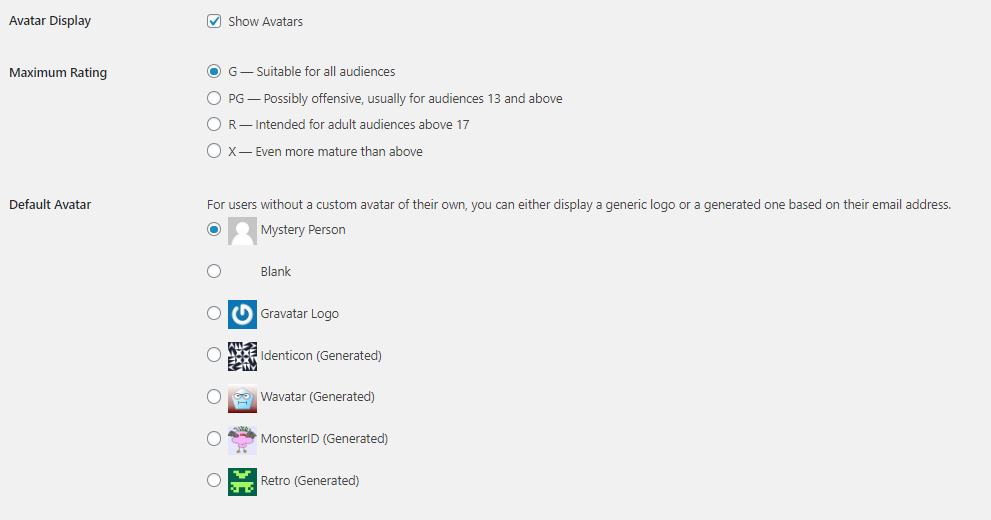
With all these settings, you’re ready to move on to the next group of WordPress settings.
5)The Media Screen
No focus on what type of site you’re managing, you’ll require to add lots of images. This suggests uploading a lot of files to your Media Library.
The Media settings allow you to customize the size selections for any images added to your library
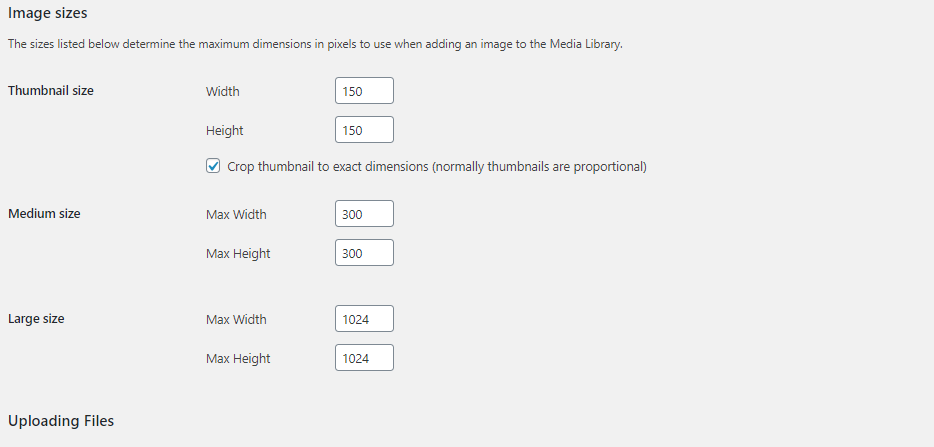
You can set multiple default sizes, from which you can pick when attaching an image to a post or page. There’s lots of guidance available online on how to decide the best size options.
6)The Permalinks screen
Permalinks are nothing but the URLs for each of your WordPress posts. To modify the look and structure of those URLs, you can use the Permalinks WordPress settings
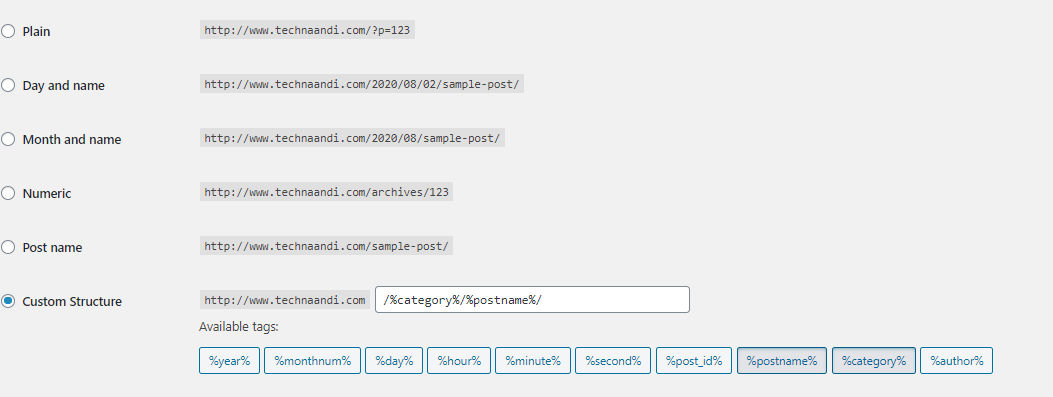
7)The Privacy screen
This is the latest of the WordPress settings screens, introduced in version 4.9.6. As the name implies, it helps you build a privacy policy for your site. This is something that’s happened in the news a lot recently, with the General Data Protection Regulation (GDPR) creating new conditions for site owners when it comes to clearness and privacy.
There are a couple of options here. You can create a privacy policy using an existing page, or a new page.

Either way, you’ll be offered with a somewhat – filled out page that you can customize
The default content will help you cover all the information your users need to be fully notified and safe. For more help developing your privacy policy page, you can check out the WordPress Codex article on the subject. You may also need to take a look at our own policy as an example you can see or privacy and policy page.
Conclusion
Although WordPress is a beginner-friendly platform, new users can become confused by its many options. Even long – time users may not have examined everything the WordPress settings have to offer.
That’s why consuming some time familiarizing yourself with these options is a good idea. Even if you don’t need to configure all of these settings now, you’ll know where to find them and how to use them when they become important. Now you know How to Configure WordPress Dashboard Settings.
Thanks for your support we will provide more tricks & tips for you. If you like our tricks, share these with your friends and join my Telegram Channel for more new tricks & tips.
Also Read Our New Trending Articles >>>>
- How To Configure Authentication Timeout In PEGA
- How To Unblock Yourself On WhatsApp
- Buy Car and Bike Accessories Online At Best Prices
- Men : Must Have Footwear Styles for Everyone
- Essential Home Accessories for a Stylish Home
- Must Have Baby Essentials : A Comprehensive Guide for New Parents
- Buy Kitchen Essentials Online in India {OLD}
- Best Deals on Bathroom Accessories | Tech Naandi Solutions
- Buy T-Shirts For Men At Best Prices Online
- Best Deals on Daily Needs | Tech Naandi Solutions


 PEGA Interview Questions
 Pega Real Time Scenarios

 Outlook
 Android Mobile
 Whatsapp Tricks
 Telegram Tricks
 Facebook Tricks
 SMS Tricks
 Online Money Earnings
 UAN & PF Services
 Latest News / Updates
 SEO Tools

 Netflix