Introduction
In this post, we will discuss how to Lock a folder in windows 10 without using any software with simple and easy steps with proof. Locking your own files can be especially valuable when you are being with curious friends or even family members. These days, making that on a smartphone is much obscure easy thanks to filing locking apps. On a Laptop/Desktop, locking an App/Folder is still moderately of a purpose.
However, Securing data and folders have been possible now with simple and easy steps. That’s usually through third-party software. Today I will explain to you how to secure/lock a folder on Windows 10 with a password without using any software.
Important Note*
While this is a tried and tested method we still can’t take any responsibility for lost files or folders😊😒. However, it is best to experiment this out beginning on a folder that isn’t important. Just interested family members or buddies who you didn’t believe.😘
Locking Folder on Windows 10
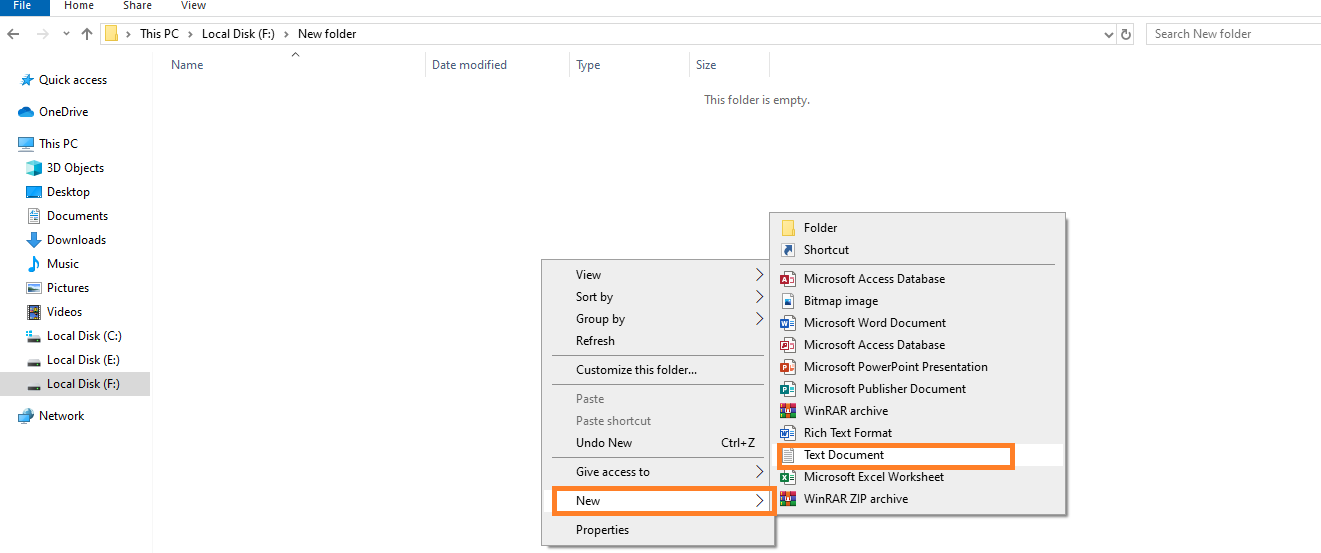
1. Firstly, Right-click inside a drive or folder where you would like to place your locked folder and select New > Text Document from the context menu. You can even do this on the desktop if you want as shown in the screen below.
2. After that enter the name of your file as anything you want or just hit Enter. The filename doesn’t actually matter you can create with any name.
3. Once the file is created, double-click on the text file to open it. Alternatively, you can just open Notepad from the Start menu and jump directly to the next point (4).
4. After that download / copy, the below code, and paste the text below into your newly created text document. You can just click on the below button click to copy code to get your code.
Setting up a password
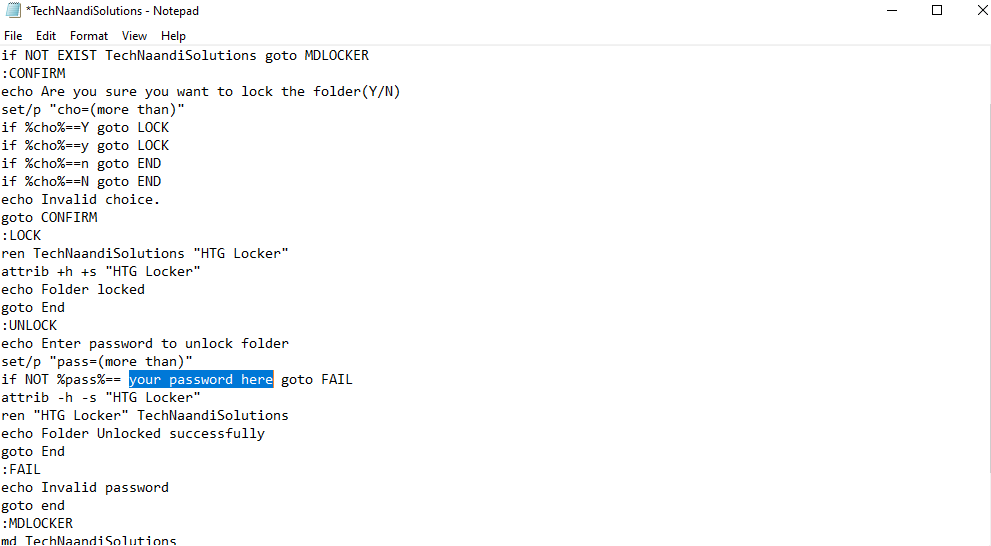
5. In-text file, find the text Your-Password-Here. You need to change Your-Password-Here to the password as want to set for the particular folder. For example, if you want the password to be 1914, remove Your-Password-Here from the file and type 1914 as shown below.
6. Now click on File > Save As ..and then in the popup pane select All files from the drop-down menu close to the name Save as type as shown in the screen below.
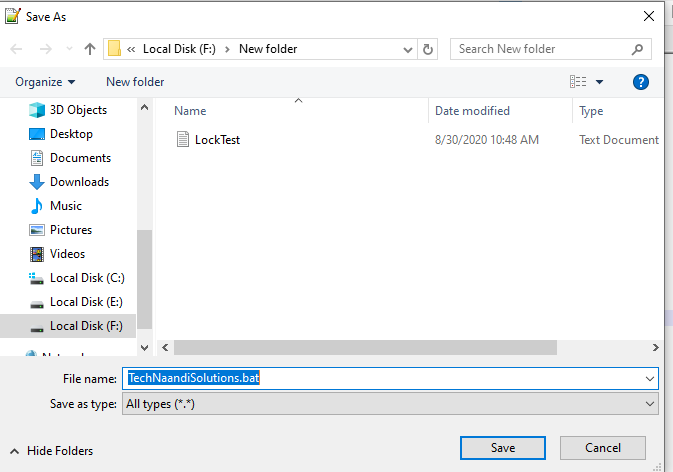
7. Now type TechNaandiSolutions.bat as the File name and click on Save. Also, you can name the file TechNaandiSolutions.bat or anything else you want with any name but always extension .bat.For the purpose of this post, we’re created TechNaandiSolutions.bat.
Creating A Folder
8. Now double-click on the TechNaandiSolutions.bat file moreover a new folder named TechNaandiSolutions will be created automatically.
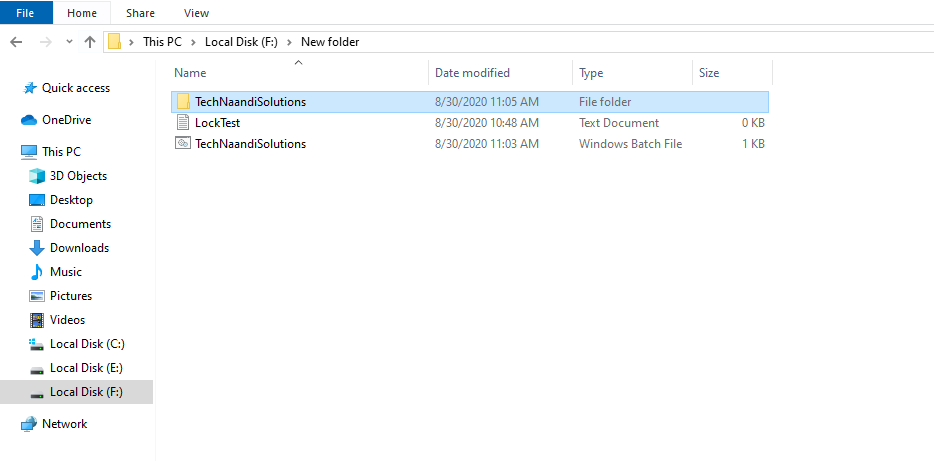
9. After that drag and drop the files which you require to protect and lock into the folder. If you’re done, double-click the TechNaandiSolutions.bat file again and now it will ask that you want to lock the folder. Type ‘Y‘ in the command prompt window and click the Enter button on the keyboard.
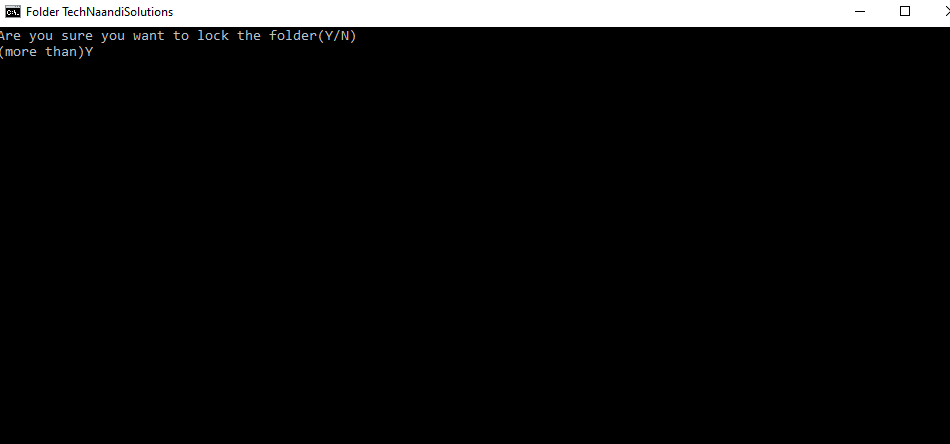
10. Now you can see that the TechNaandiSolutions folder is no more visible😁😂. It can’t be viewed even if you turn on the option to display hidden files. Even if you try locating the folder via the address bar, Windows will deliver the message that it could not find the folder.👌😍
11. The only method to obtain the folder again is to double-click on the TechNaandiSolutions.bat file again. This time, it’ll ask you to enter the password you have given in the text file (My Password is 1914 ). Type the password and click Enter and now you can see the folder will appear again.😘When you’re done with your folder double-click on the TechNaandiSolutions.bat file again and you can lock it again.
Conclusion
Finally, you have happily secured a folder on your Windows10 and now you have a secret safe inside your Laptop/Desktop. However, now you have a trick to Lock a folder in windows 10. To get more useful tricks please follow Tech Naandi Solutions and feel free to contact us if you have any quires.
Thanks for your support we will provide more tricks & tips for you. If you like our tricks, share these with your friends and join my Telegram Channel , WhatsApp Channel And Youtube Channels for more new tricks & tips.


 PEGA Interview Questions
 Pega Real Time Scenarios

 Outlook
 Android Mobile
 Whatsapp Tricks
 Telegram Tricks
 Facebook Tricks
 SMS Tricks
 Online Money Earnings
 UAN & PF Services
 Latest News / Updates
 SEO Tools

 Netflix
